
Projects and Environments
Create a project
The active project is shown in the bottom left of the Hop Gui status bar (briefcase icon and project name). Click it to open the project menu.
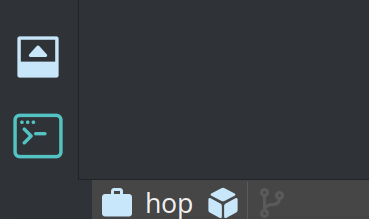
Choose Add project… and then In a folder to add a project from an existing folder. That opens the project properties dialog.

From version control checks out a project from a Git repository instead.
The project properties fields are grouped on four tabs: Basic, Folders, Parent project, and Variables.
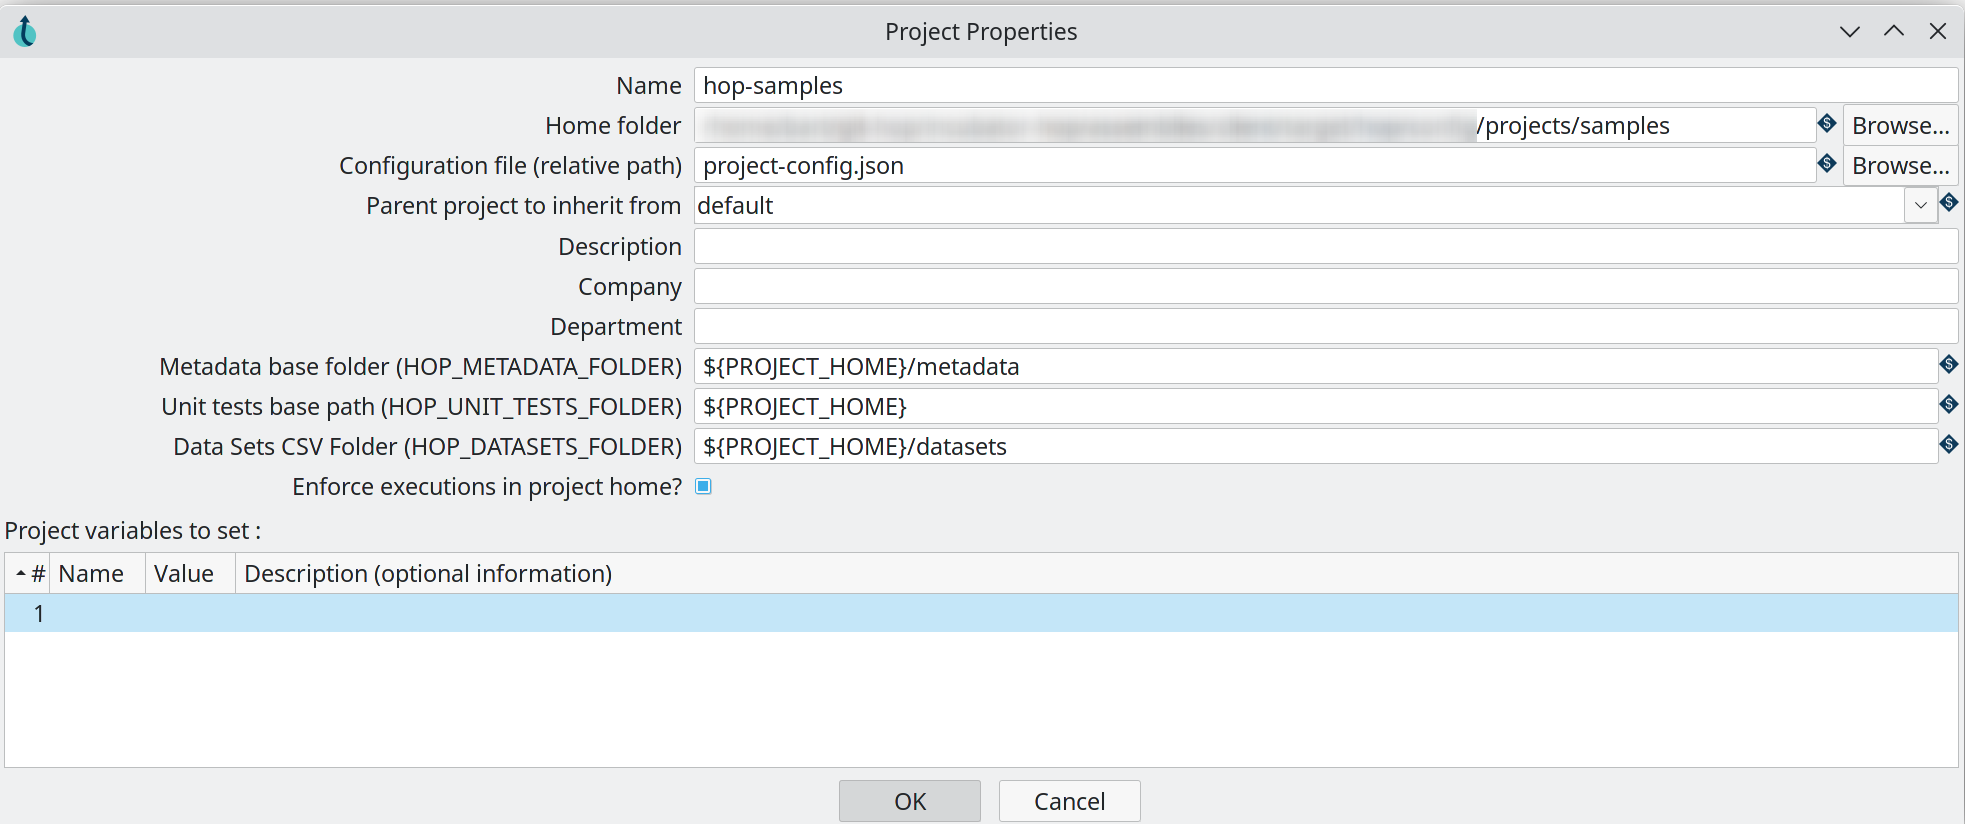
| Property | Description | Variables Supported | Mandatory | Default |
|---|---|---|---|---|
Name |
The project name |
Yes |
No |
|
Project id |
Optional id stored in |
No |
No |
empty (the project name is suggested for a new project) |
Home folder |
The folder where the project is located. Paths starting with |
Yes |
No |
|
This project is read only |
When checked, Hop does not write |
No |
No |
unchecked |
Configuration file (relative path) |
The project’s configuration json, relative to the home folder. |
Yes |
Yes |
|
Group |
Optional topic stored on the project registration in |
Yes |
No |
|
Description |
A description for this project |
No |
No |
|
Company |
The company this project belongs to |
No |
No |
|
Department |
The department this project is created for |
No |
No |
|
Version |
A version label for the project |
No |
No |
|
Auto-export metadata |
Write a single metadata JSON file when the project is enabled or metadata changes |
No |
No |
unchecked |
Auto-export metadata filename |
Target file for auto-export, relative to the project home |
Yes |
No |
|
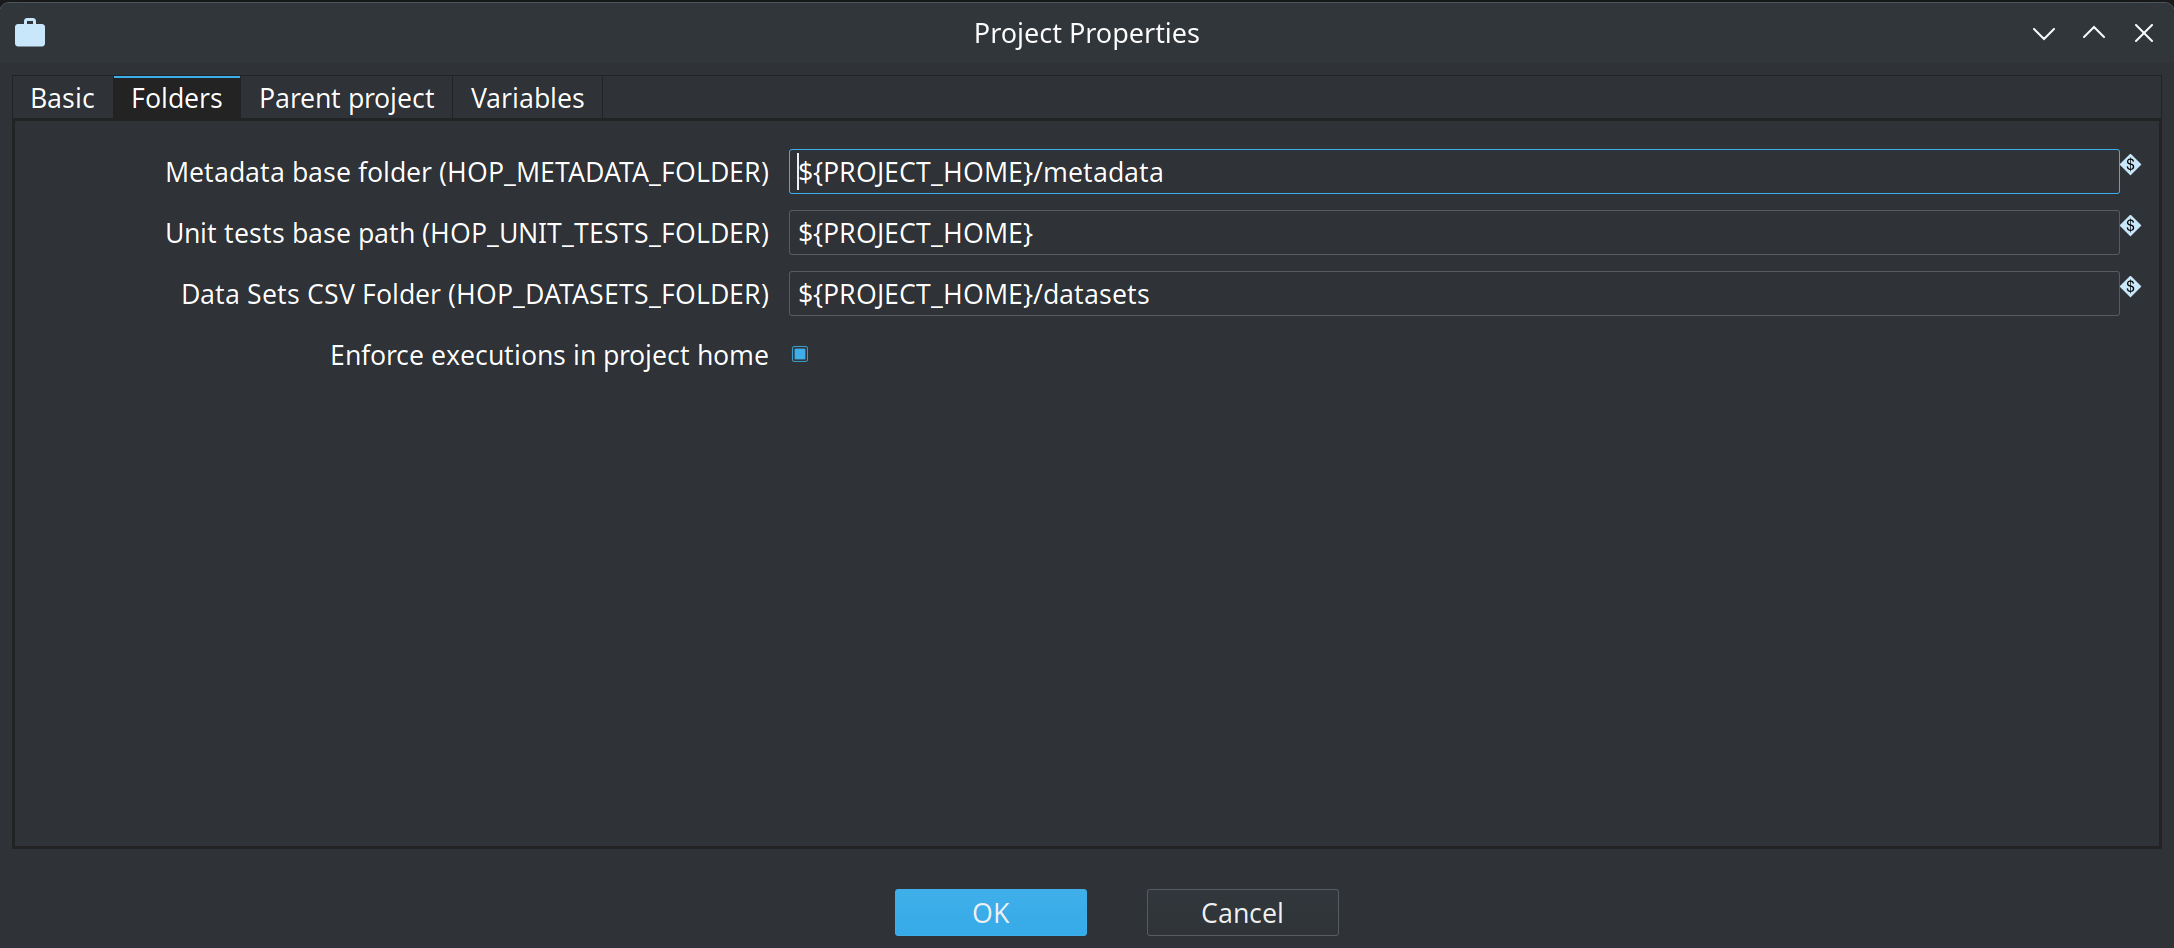
| Property | Description | Variables Supported | Mandatory | Default |
|---|---|---|---|---|
Metadata base folder |
The folder where this project’s metadata will be stored |
Yes |
Yes |
${PROJECT_HOME}/metadata |
Unit test base path |
The base path to use for unit tests in the project. If your |
Yes |
Yes |
${PROJECT_HOME} |
Data Sets CSV Folder |
The folder where this project’s data files will be stored |
Yes |
Yes |
${PROJECT_HOME}/datasets |
Enforce execution in project home |
Give an error when trying to execute a pipeline or workflow which is not located in the project home directory or in a sub-directory |
No |
No |
checked |
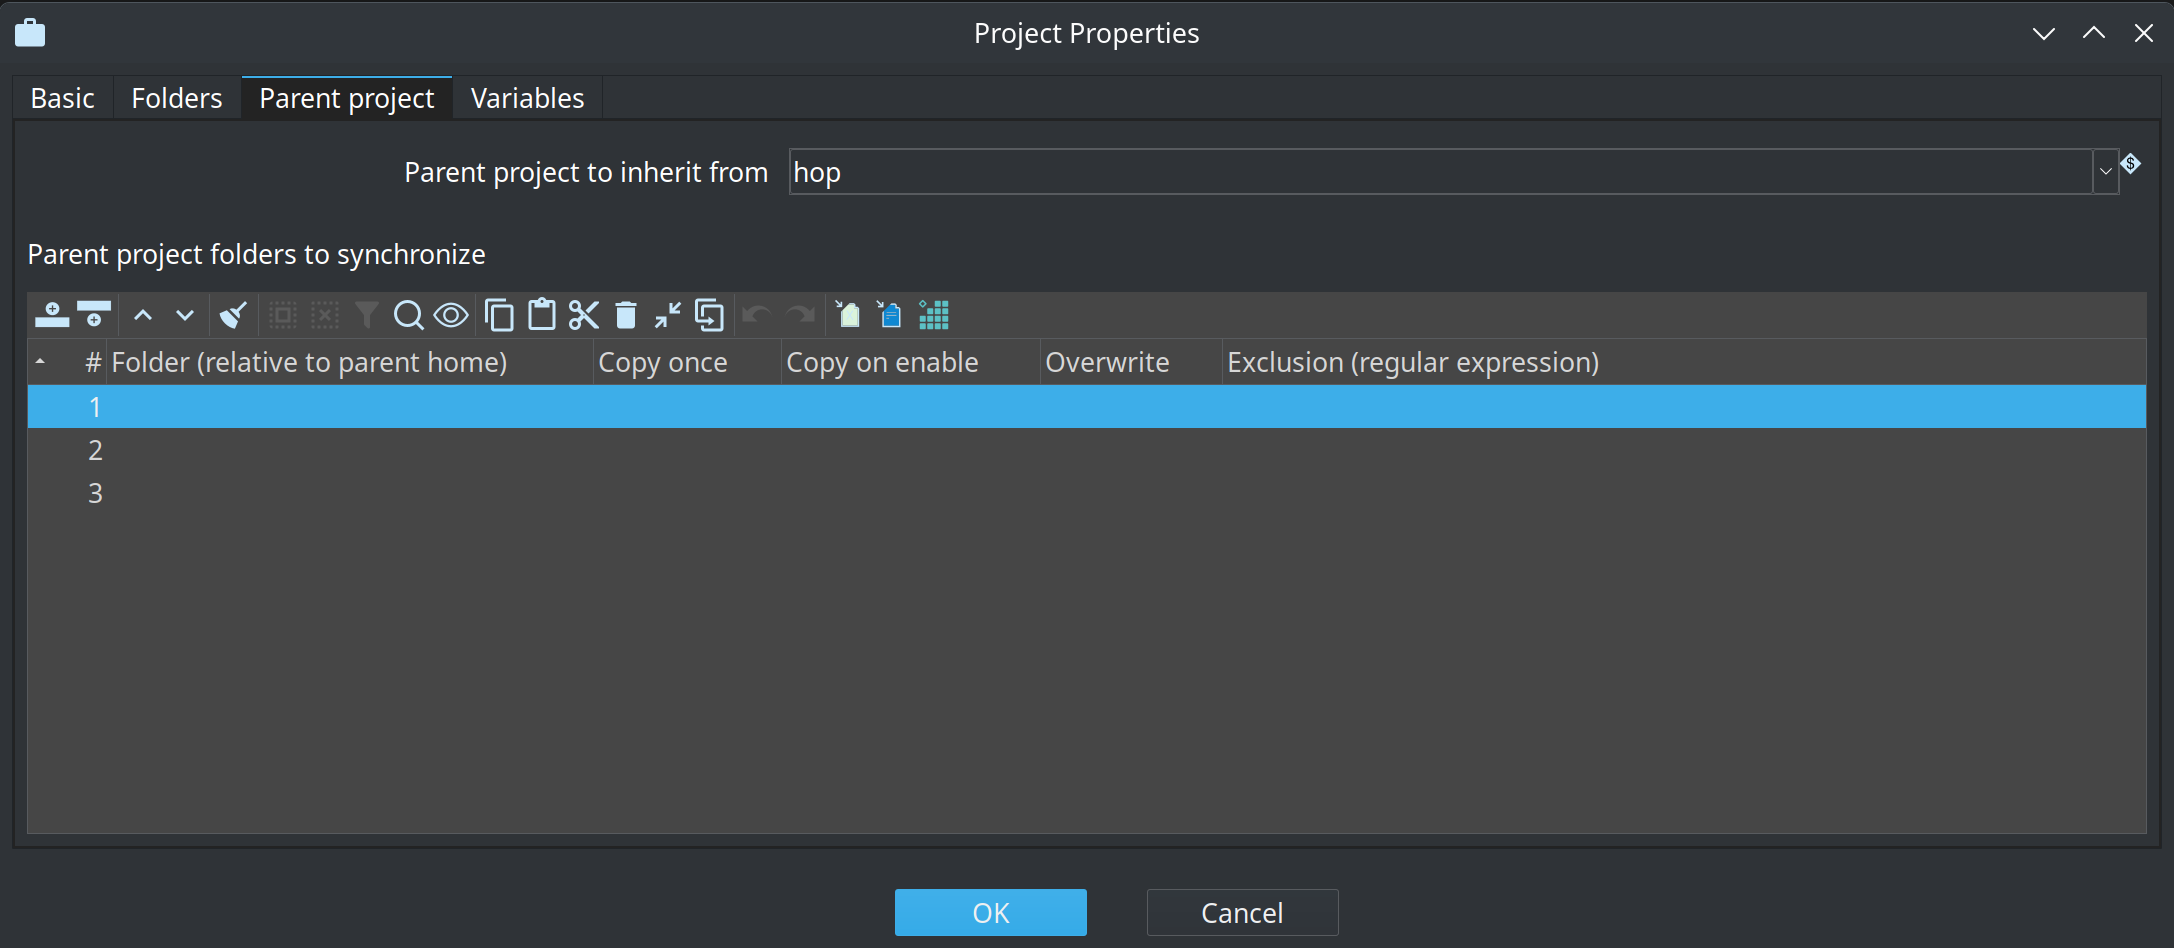
| Property | Description | Variables Supported | Mandatory | Default |
|---|---|---|---|---|
Parent project to inherit from |
The project to inherit metadata (e.g. connections) and variables from |
Yes |
No |
default |
Parent project folders to synchronize |
Zero or more folders to copy from the parent project home into this project. See below. |
Yes |
No |
Each row in Parent project folders to synchronize copies that folder (or . for the parent root) into the same relative path in the child project.
All files are copied, not only pipelines and workflows.
| Column | Description |
|---|---|
Folder |
Path relative to the parent project home. |
Copy once |
Copy when the destination folder is missing or empty (a newly created project home that only contains |
Copy on enable |
Copy every time this project is enabled (Hop Gui, |
Overwrite |
Replace files that already exist in the child project. When unchecked, existing files are kept. |
Exclusion (regular expression) |
Java regular expression matched against the file base name and the path relative to the copied folder. Example: |
The child’s project-config.json and any .git directory are never copied or overwritten, even with overwrite enabled.
If both Copy once and Copy on enable are checked, copy-on-enable wins.
If neither is checked, the row is skipped.
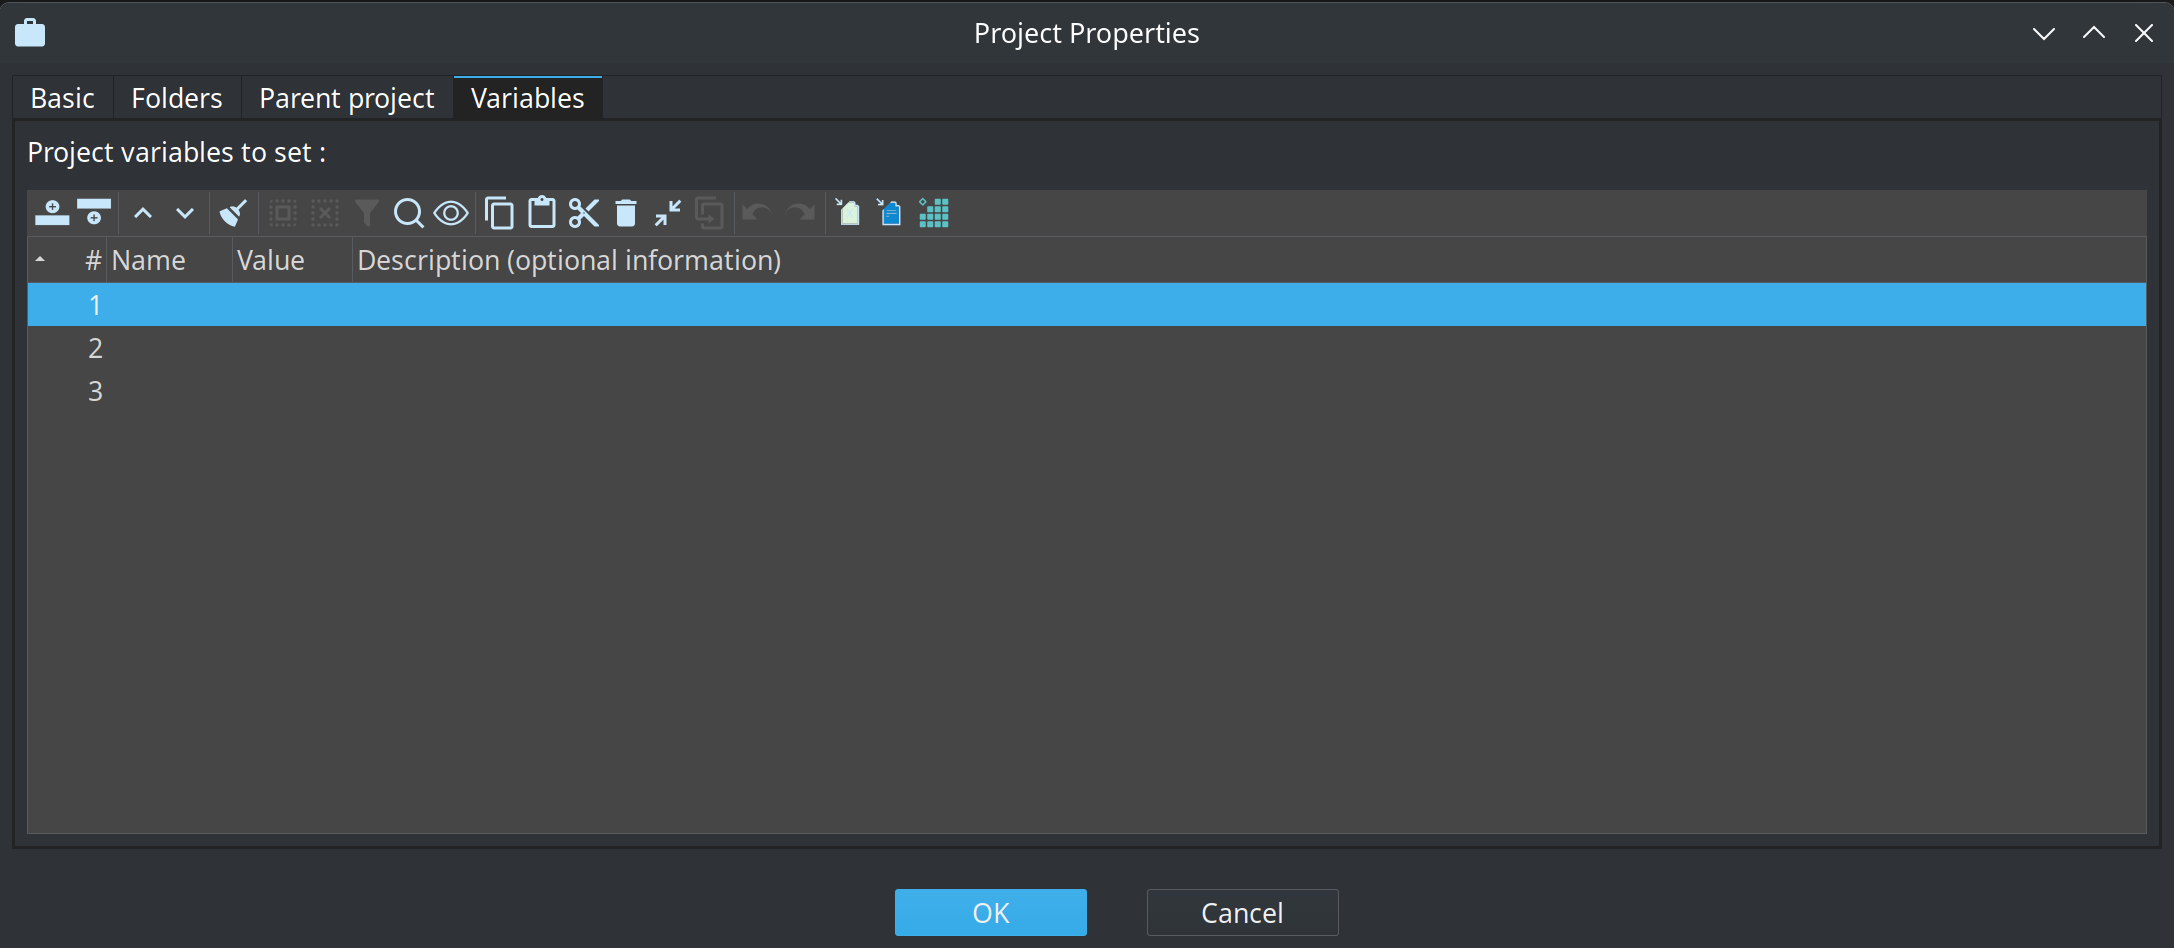
| Property | Description | Variables Supported | Mandatory | Default |
|---|---|---|---|---|
Project variables to set |
A list of variable names, values and variable descriptions to use with this project |
No |
No |
After creating a project the user interface will switch to it and ask if you want to create an environment.
Create an environment
The active environment is shown next to the project in the bottom left of the Hop Gui status bar (cube icon). Click it to open the environment menu, then choose Add environment….
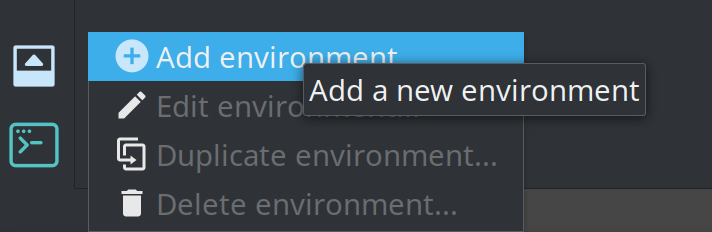
This opens the environment properties dialog. The fields are grouped on tabs: General, Configuration files, and when the matching plugins are installed Marketplace plugins and System resources.
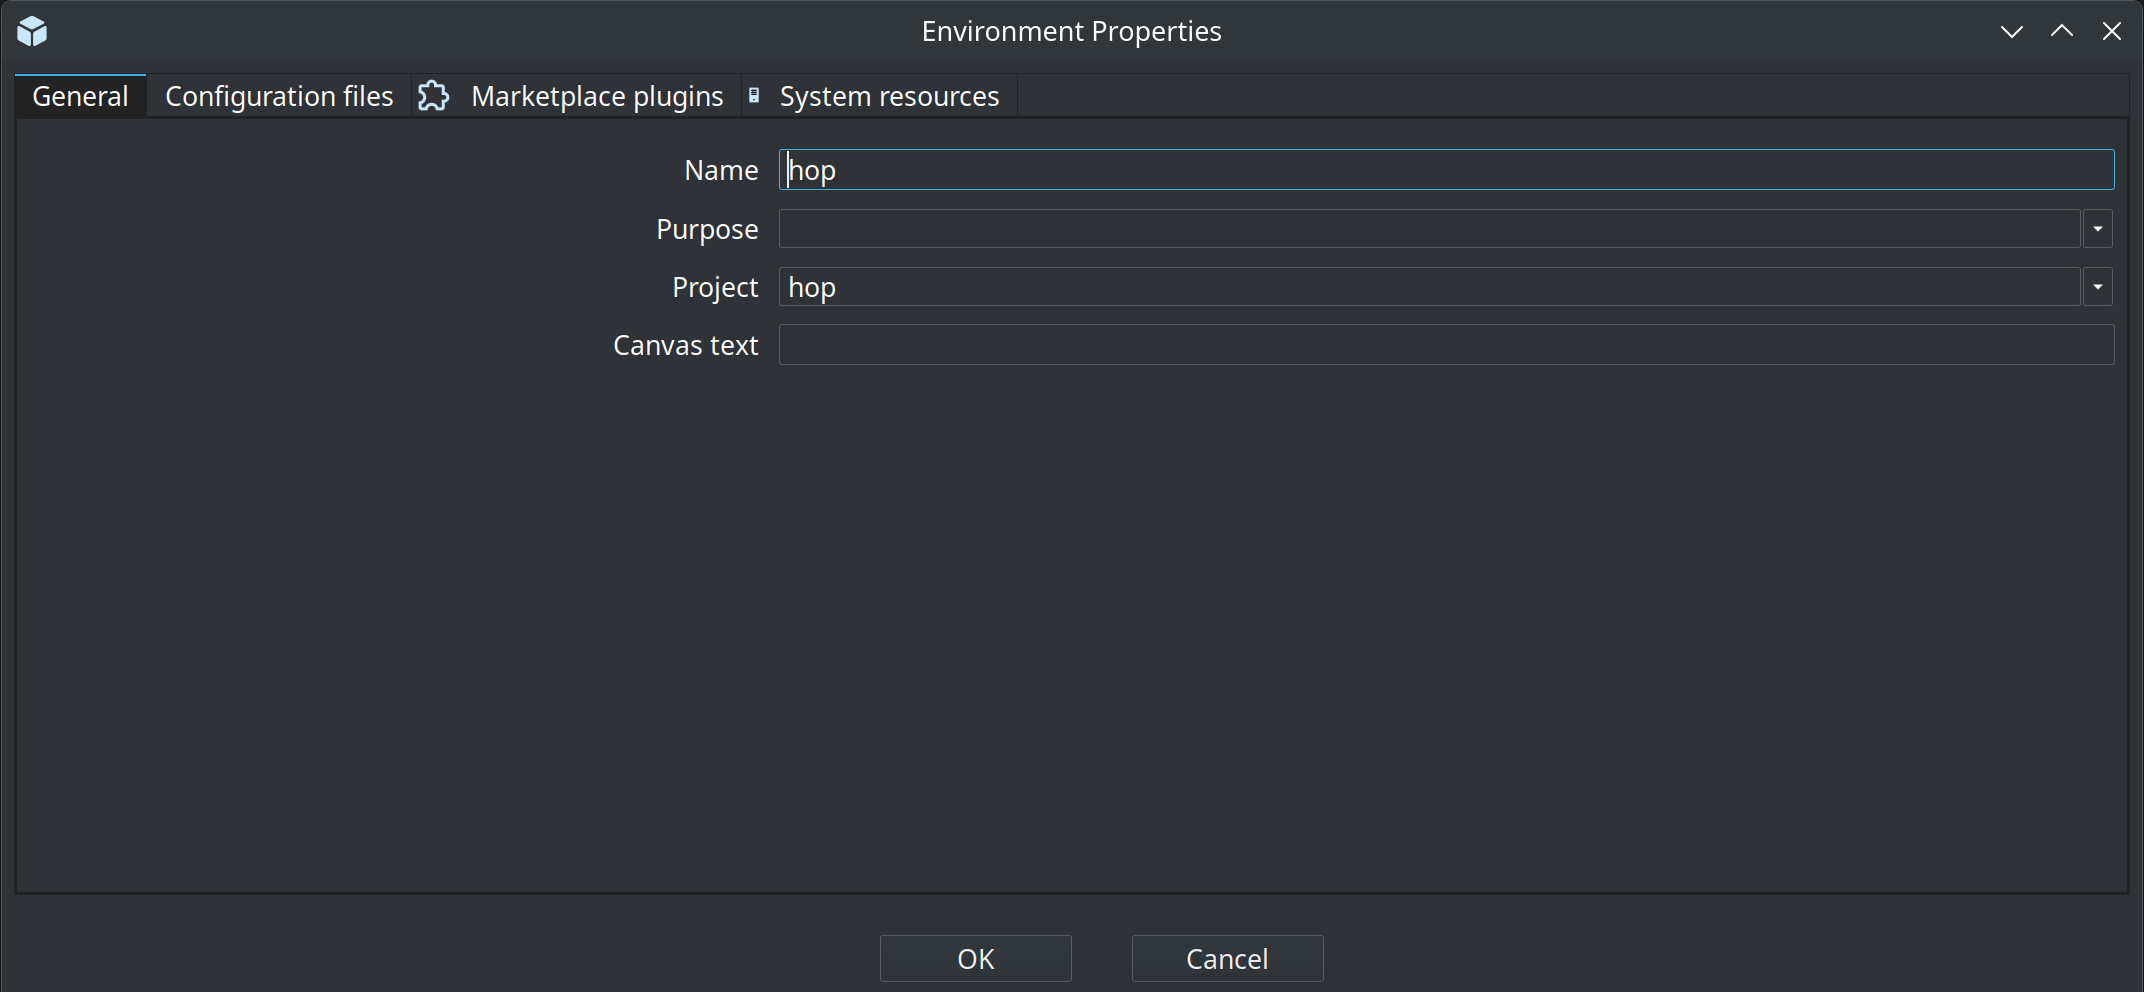
| Property | Description | Variables Supported | Mandatory | Default |
|---|---|---|---|---|
Name |
The environment name |
No |
No |
Suggested from the project name and purpose |
Purpose |
The purpose of this environment. A purpose is an indication of the environment type. You can add your own purposes in addition to the predefined ones:
|
No |
No |
|
Project |
The project to which this environment belongs |
No |
No |
The last created project |
Canvas text |
Large text drawn in the top-right of pipeline and workflow canvases when this environment is active |
Yes |
No |
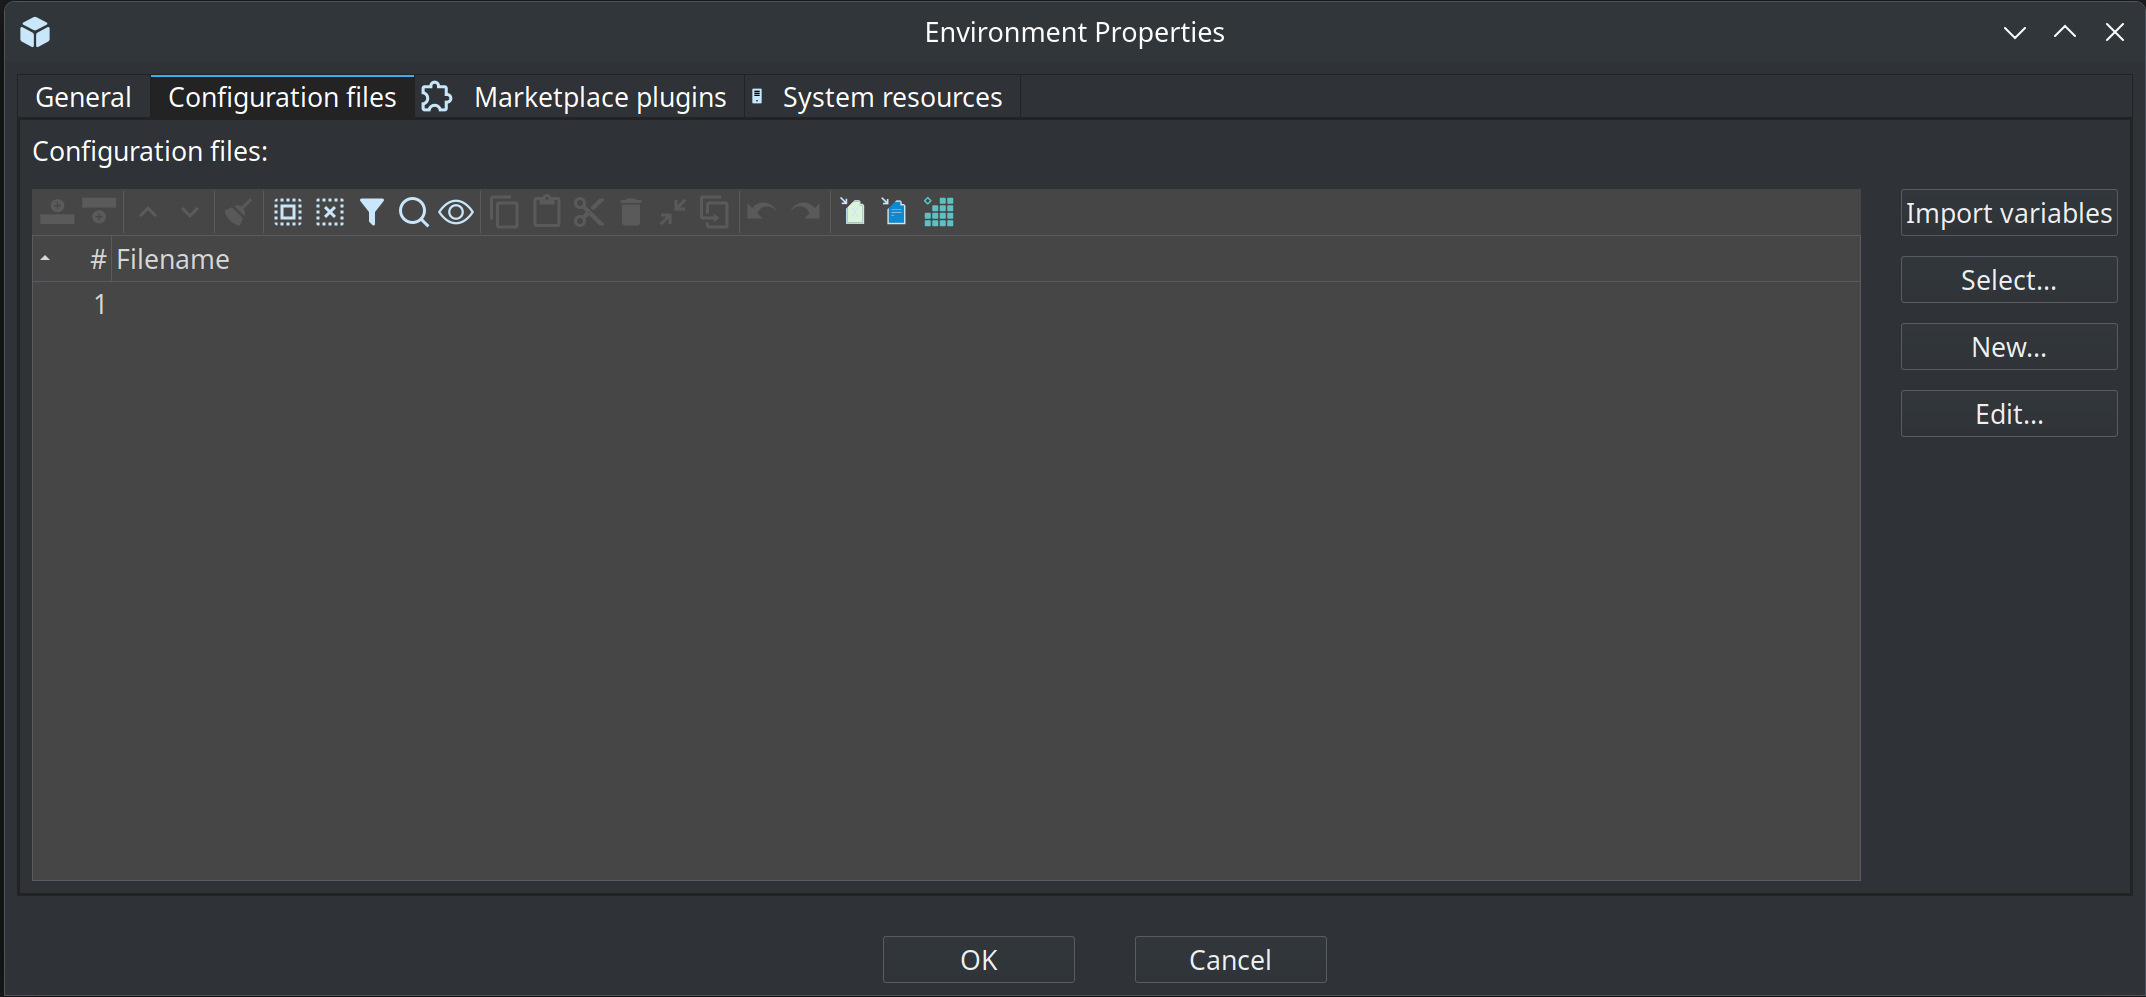
| Property | Description | Variables Supported | Mandatory | Default |
|---|---|---|---|---|
Configuration files |
One or more files that define environment-specific variables. Each row is a filename and a description |
Yes |
No |
|
Description |
Short note about that file. It is stored in the JSON file, not on the environment |
No |
No |
|
File or directory |
A single configuration file, or a folder to scan. Add puts the matching files into the list below |
Yes |
No |
|
Inclusion wildcard (RegExp) |
Regular expression matched against the file name, for example |
Yes |
No |
|
Exclusion wildcard (RegExp) |
Regular expression for file names to skip, for example |
Yes |
No |
|
Include subfolders |
Also add matching files from subfolders |
No |
No |
|
Add |
Resolve the file or folder and append each match to the list. The environment still stores one path per file |
No |
No |
|
Import variables |
Scan the project for |
No |
No |
|
Select… |
Add one or more existing configuration files. Several files can be selected at once |
No |
No |
|
New… |
Create a new configuration file and add it to the environment |
No |
No |
|
Edit… |
Open the selected configuration file to set its description and the variable names, values and descriptions |
No |
No |
Each environment contains one or more configuration files where you manage environment-specific variables.
Add expands a file or a folder into that list immediately, using the same regular-expression rules as the JSON Input and Get File Names transforms. A folder is not stored as a wildcard. After the files are added, each row is still one file, so Edit… opens that file.
Store secrets (database passwords, API keys, tokens) in these files as variables, not in project metadata or pipelines. Keep the files outside the project folder so they are not checked into the project repository. Better still, store the value in a keystore or vault and put a variable resolver expression in the configuration file. See Best practices: security and AI Assistant: secrets.

Edit… opens the described variables dialog for the selected file. The description at the top of that dialog is the same file description as the Description column.
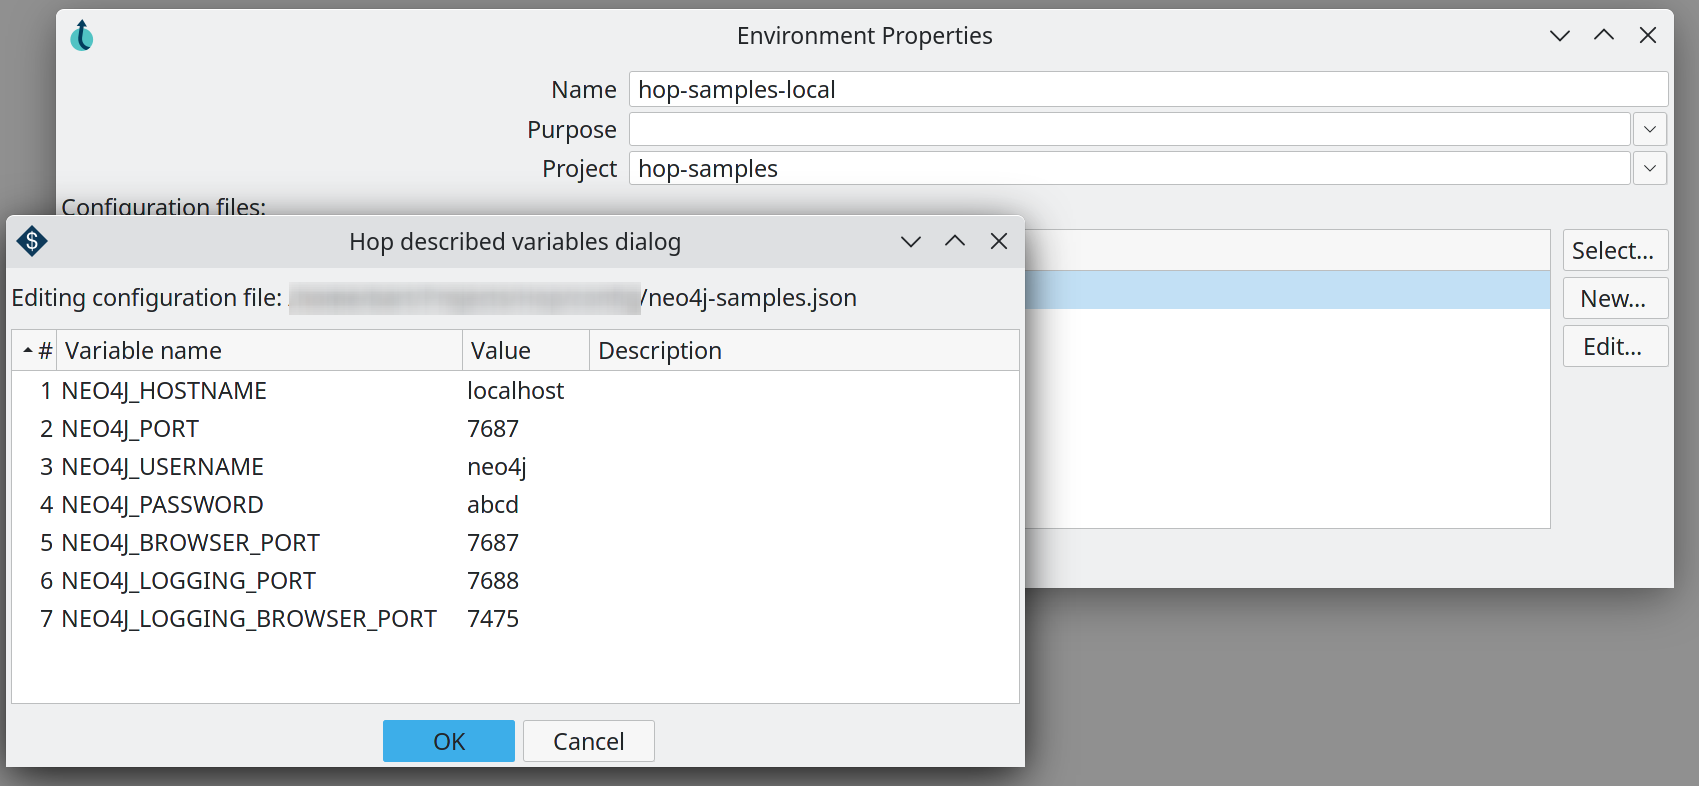
The description is written into the configuration file when you confirm the environment dialog.
A file whose description did not change is left as it is.
A file that does not exist yet is created when the description is not empty.
Hover a row to see that description and the variables stored in the file.
Values are shown as they are written, not with variables resolved.
The value is hidden when the variable name contains password, passwd, secret, token or credential, and when the value is an encrypted Hop password.
A configuration file looks like this:
{
  "description" : "Warehouse connection for this environment",
  "variables" : [ {
    "name" : "DB_HOSTNAME",
    "value" : "db.example.com",
    "description" : "Warehouse host"
  } ]
}
When you browse for a file or directory in Hop Gui with a project active, paths under a matching path-like variable are rewritten automatically. For example, ${PROJECT_HOME} is used for files under the project home, and an environment variable such as SOURCE_FILES=/data/incoming (or SOURCE_FILES=~/incoming) rewrites a selection under that folder to ${SOURCE_FILES}/…. If more than one variable matches, the longest (most specific) path wins. The same applies to path variables defined on the project itself.
After creating an environment the user interface will switch to it.
Marketplace plugins
When the Marketplace plugin is installed, the environment properties dialog includes a Marketplace plugins tab.
These options control whether Hop checks a Hop install spec (hop-env.yaml) when this lifecycle environment is enabled.
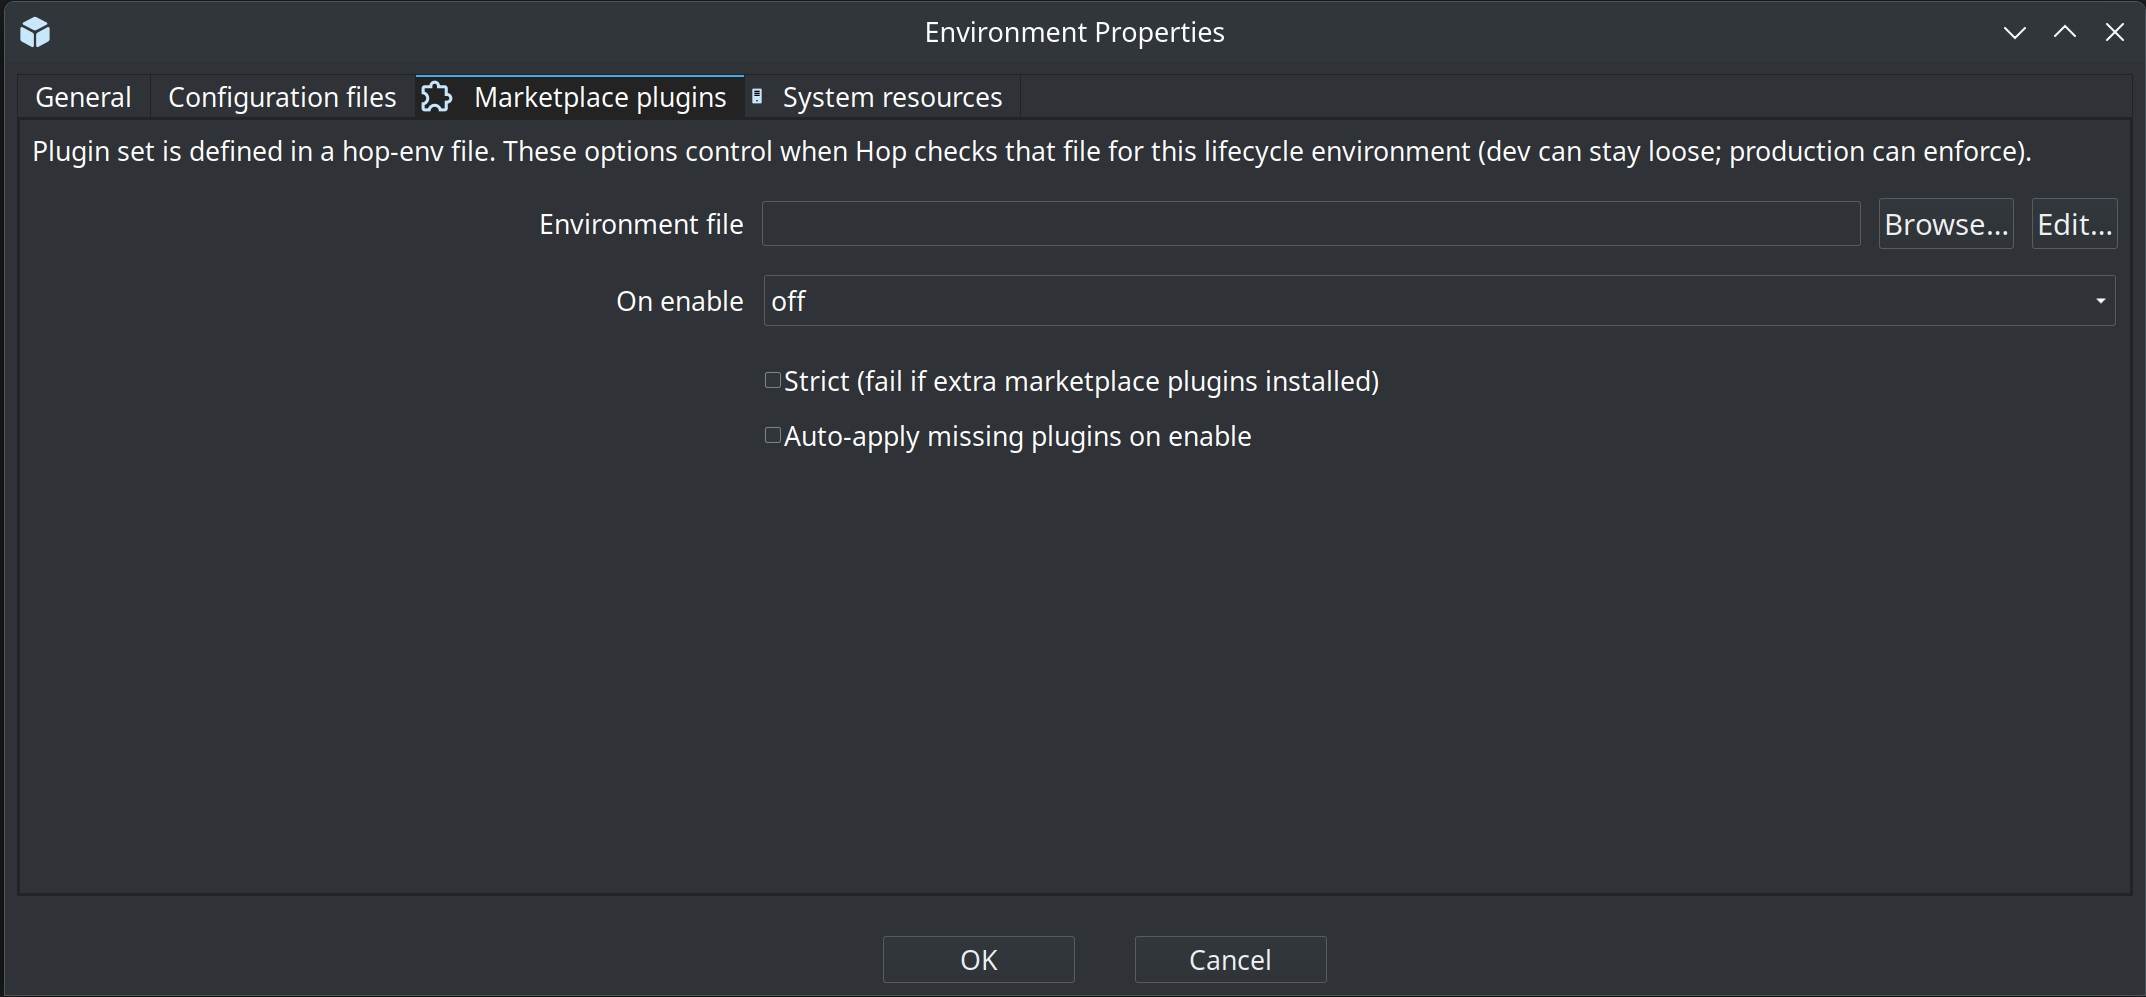
Typical options:
-
Install spec file — path to a
hop-env.yaml(variables allowed, for example under the project home). This is not a lifecycle environment config file. -
On enable —
off(no check),warn(log or dialog on drift), orenforce(fail enabling the environment if the install does not match) -
Strict — treat extra marketplace plugins as drift
-
Auto-apply missing plugins on enable — optional; off by default
See Hop Marketplace for the full description of lifecycle environment plugin checks.
System resource requirements
Lifecycle environments can declare system resource requirements for the host where Hop runs. Open the environment properties dialog and select the System resources tab.
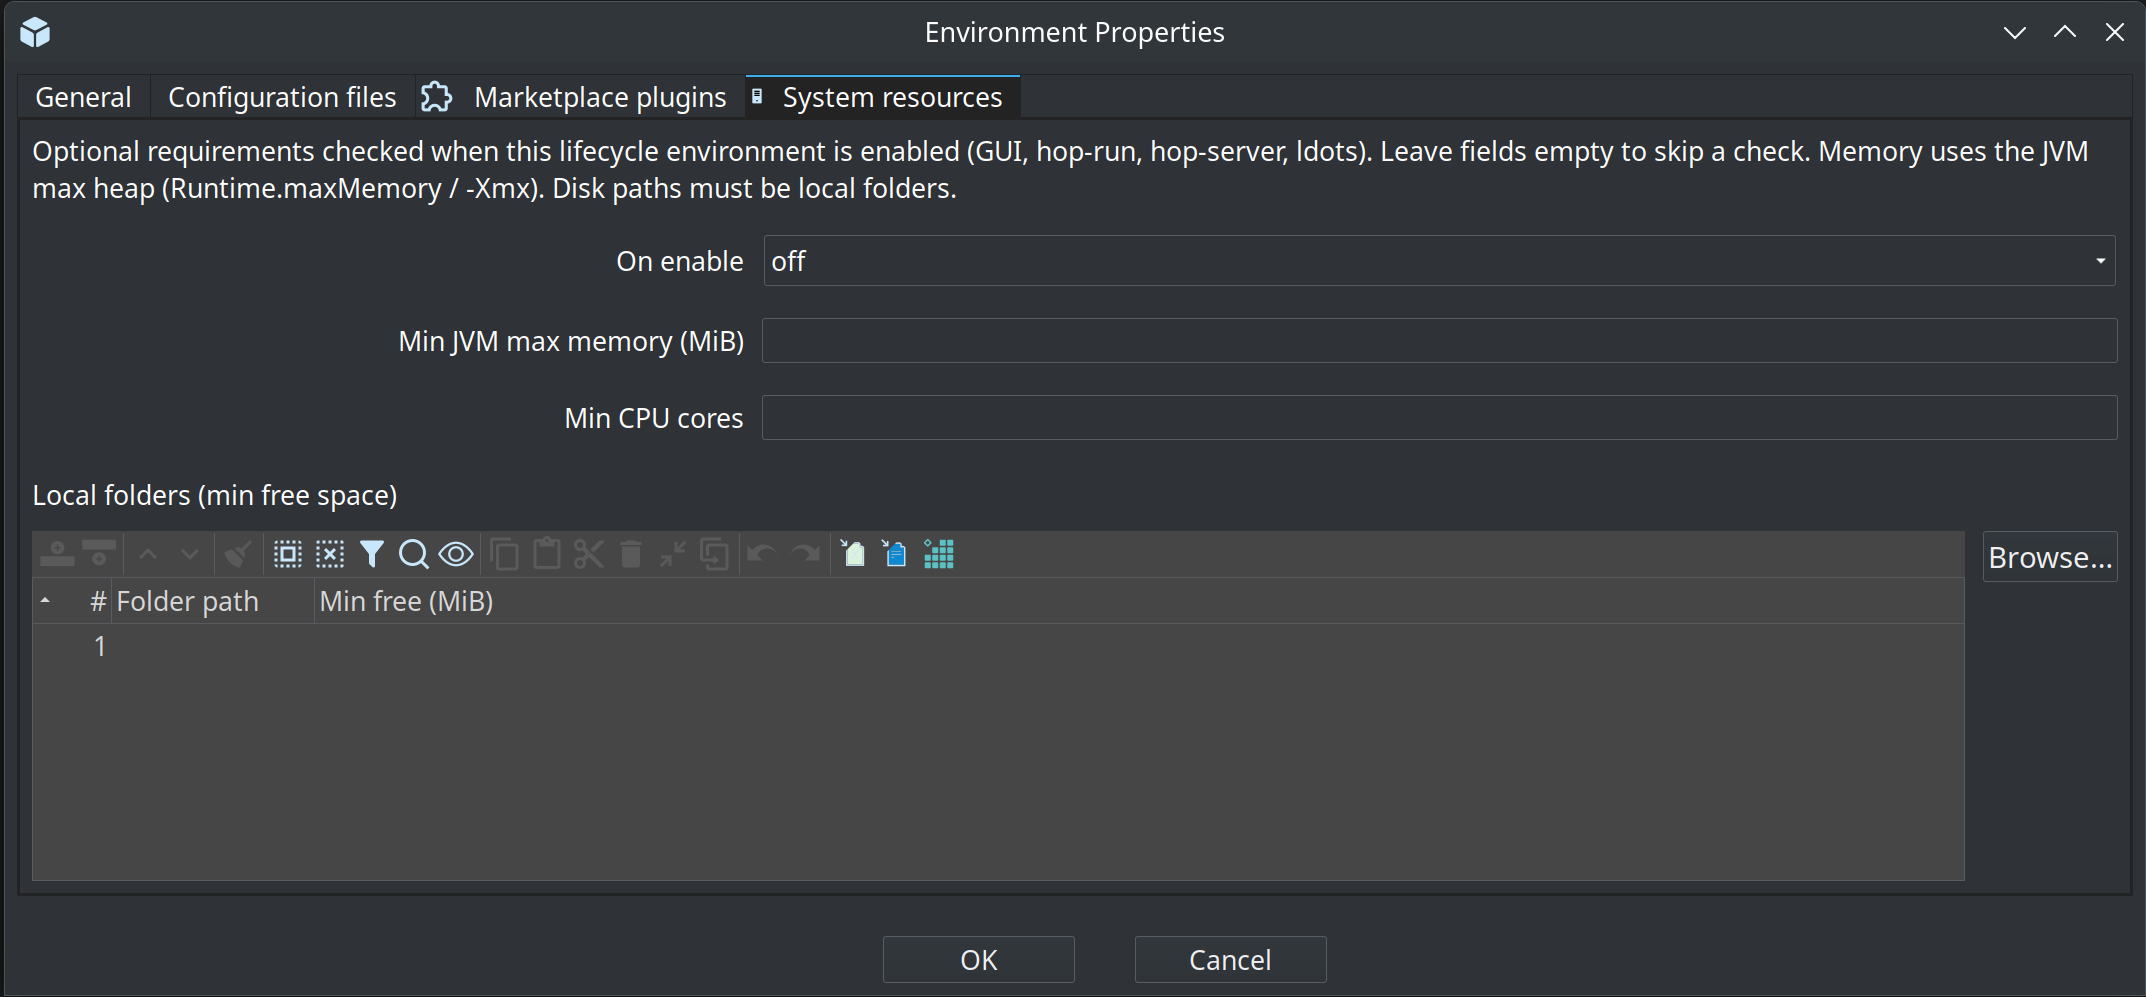
When the environment is enabled (Hop Gui, hop-run -e, hop-server -e, and other tools that call project enablement), Hop can check:
-
Min JVM max memory (MiB) — the JVM max heap (
Runtime.maxMemory(), i.e. configured-Xmxcapacity), not the currently allocated heap. -
Min CPU cores —
Runtime.availableProcessors(). -
Local folders (min free space) — one or more local paths and a minimum free space in MiB (
File.getUsableSpace()). Both the path and the min-free value support Hop variables and expanded number forms (viaConst.toLongExpanded). Paths must resolve to local folders.
Leave a field empty to skip that check.
| Value | Behavior |
|---|---|
off |
Do not check (default for Development / CI / CB and when purpose is unset). |
warn |
Log a failure report; in Hop Gui show a warning dialog. Environment enable continues. |
enforce |
Fail enabling the environment with a fatal error. Default for Production. |
If On enable is left unset, Hop derives a default from the environment Purpose: Production → enforce; Testing / Acceptance → warn; otherwise off.
These checks run on the JVM that enables the environment. They do not validate remote Beam workers or other remote runtimes.
Switch between projects and environments
Click the project indicator at the bottom left and choose a recent project from the menu, or More projects… to pick from a list.
Projects with a group are not repeated in that recent list. Each group is its own submenu and lists every project in the group, so a long flat list becomes one entry per topic. Set the group on the project properties Basic tab, or when editing the project registration from More projects…. Projects without a group stay in the recent list (up to 15).

After switching to a project, click the environment indicator (cube icon) next to the project name and choose an environment from the menu. The menu only lists the environments of the active project, plus environments that are not linked to any project. All open files will be restored, including their zoom level and other UI settings.

Edit and delete projects
Click the project indicator at the bottom left, then choose Edit project… to re-open the project properties dialog described above.
Choose Search projects… from the same menu to search pipelines, workflows, metadata and variables across every configured project and environment, not only the project that is open. A project the current user is not allowed to open is left out. Opening a result from another project asks to switch to that project before the file is opened. The active project search (Ctrl+F and hop-search) still uses only the active environment’s configuration files.
Choose Delete project… from the same menu to remove the project from the Hop configuration.
Edit, duplicate and delete environments
Click the environment indicator at the bottom left to open the environment menu.
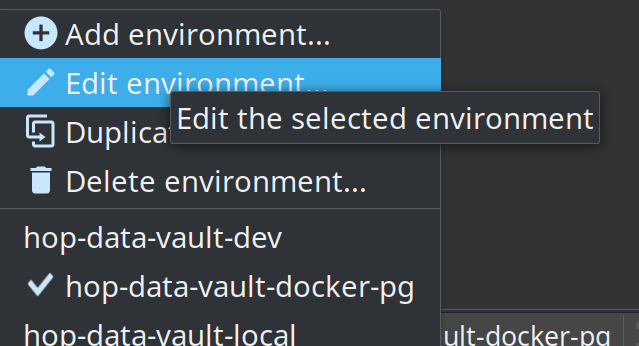
-
Edit environment… re-opens the environment properties dialog described above.
-
Duplicate environment… creates a copy of the selected environment.
-
Delete environment… removes the environment from the Hop configuration.