Hop Gui Popup (Context) Dialog
The Hop Gui popup dialog is a contextual dialog that allows you to perform a lot of operations on metadata, workflows and pipelines.
The popup dialog was designed to enable fast development through search and single clicks.
Hover over any of the available options in the popup dialog to see a description of that option. The example below shows the description for the Copy as workflow action option from the workflow popup.

The search bar at the top of the dialog enables Hop developers to
-
search the available items in the dialog. The list of available items is updated as you type. Navigate to the item you need using the arrow keys and hit enter or single-click on an item to select an item or add an action or transform to your workflow or pipeline.
-
collapse or expand all categories
-
show categories: show the available items in a categorized list, or as one large list of items
-
fixed width: display all items in a fixed with, tabular layout


Creating Items
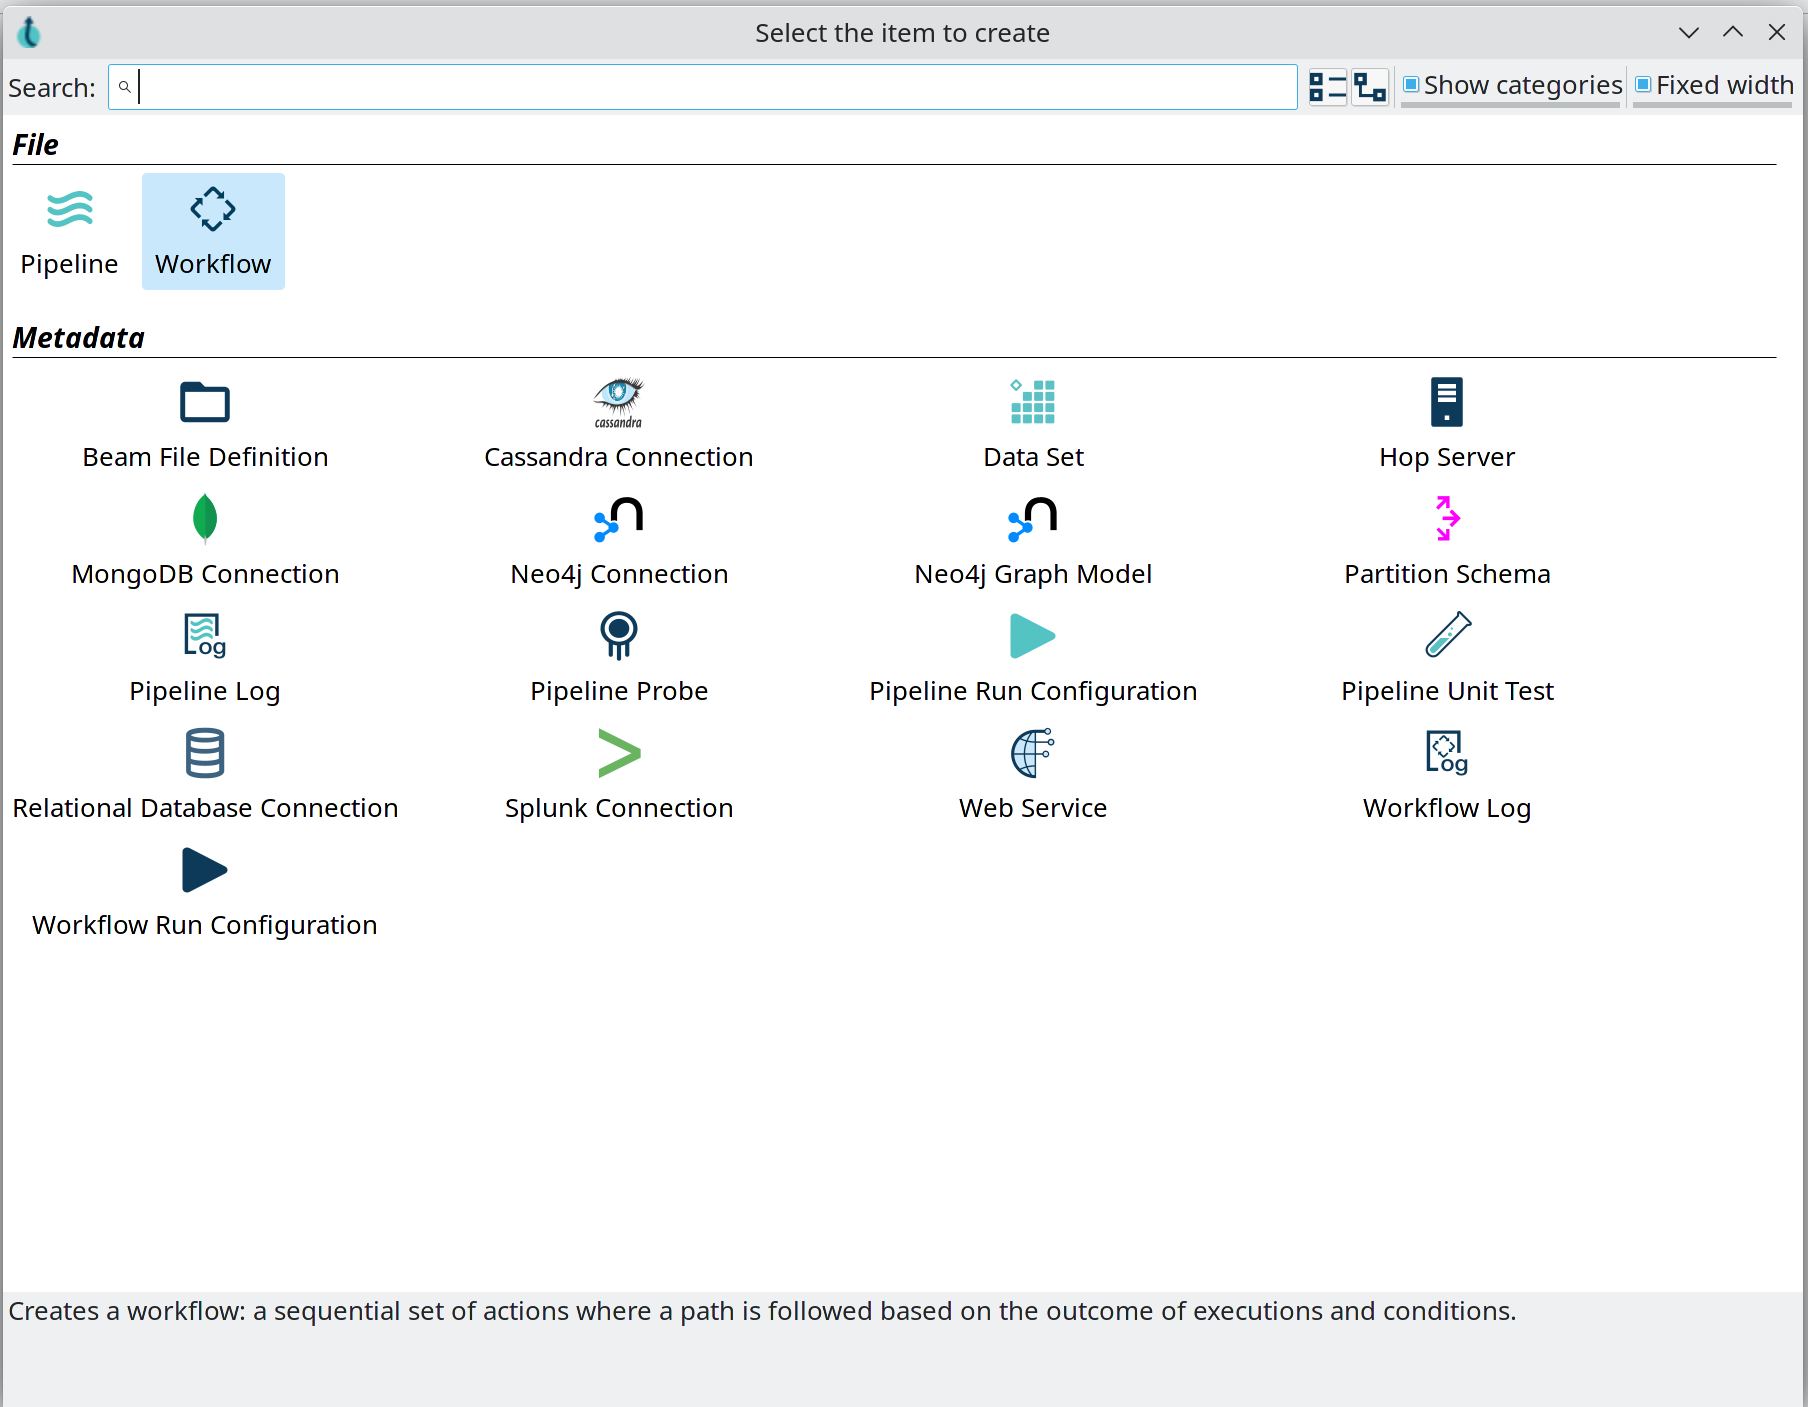
When you create a new item, the dialog will show you a list of metadata items that can be created with a single click of a button.
Create a new item either by clicking the CTRL-N |
-
File
-
Metadata

Workflow Options
The 'Basic' category contains a number of operations you can perform on the current workflow.
-
edit workflow: edit this workflow’s properties: description, parameters etc.
-
create a note: add a note to this workflow
-
paste from the clipboard: paste actions, notes or an entire workflow from the clipboard
-
copy as workflow action: copy this workflow to the clipboard as a workflow action, so you can paste it in another workflow as a pre-configured workflow action
All other categories contain the actions you can add to your workflow.
Check the full list of actions for detailed information on the available action options.

Workflow Action Options
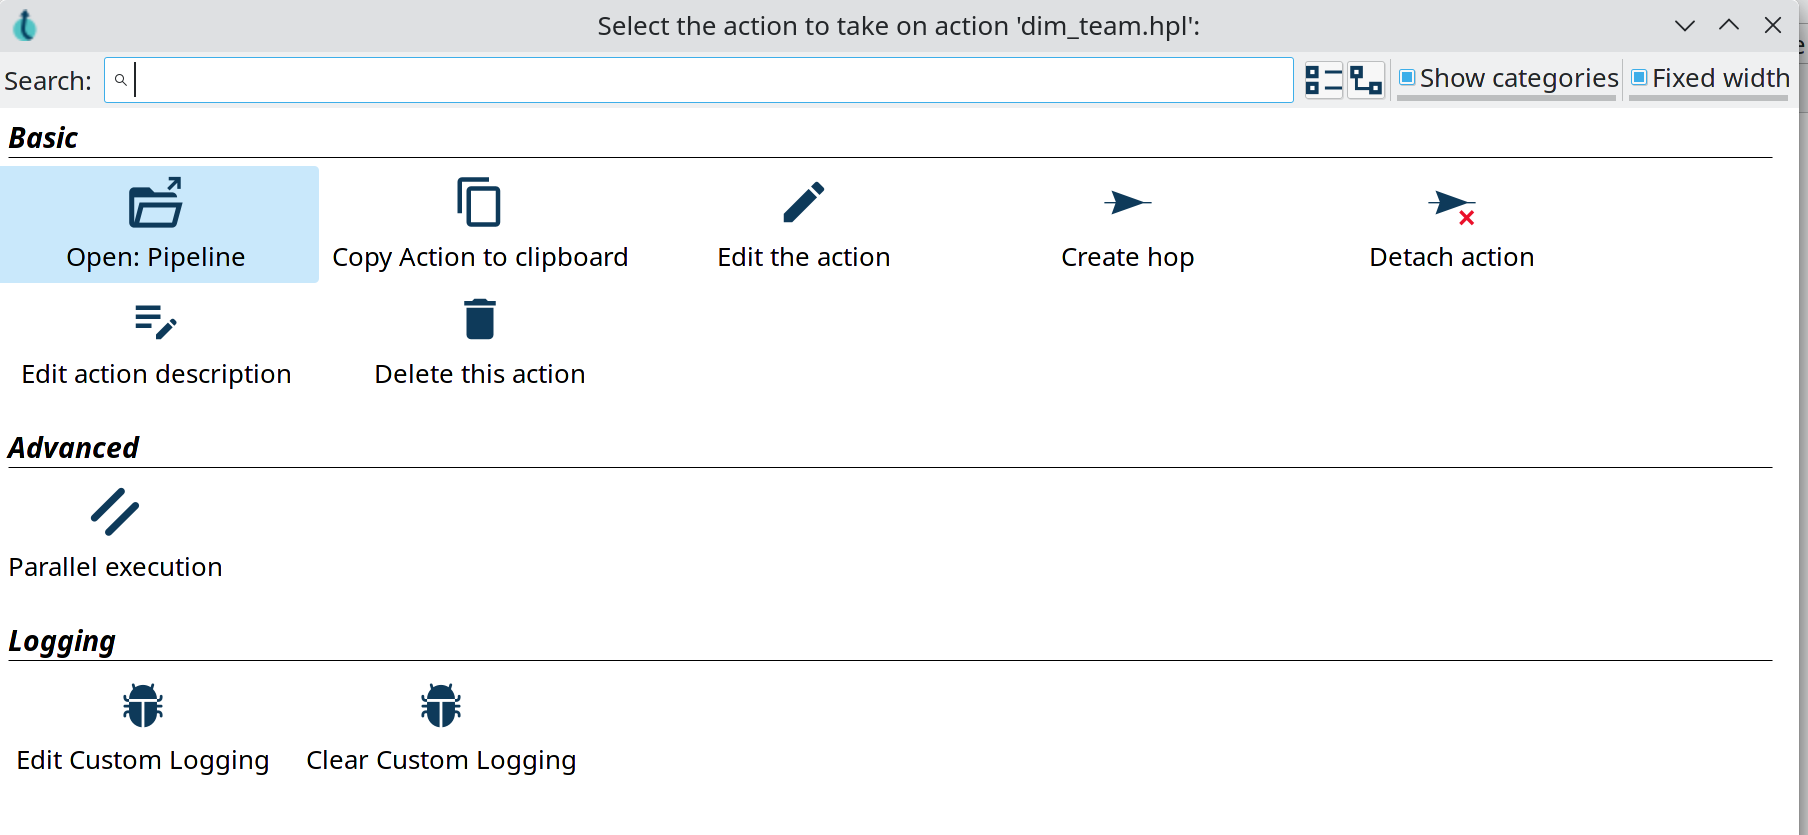
When clicking on an action icon, the popup contains a number of actions to work with actions:
-
Basic
-
Open: Action Type: open the selected action type. This is available for workflow, pipeline actions etc.
-
Copy Action to clipboard: copy this action to the clipboard, so you can paste it in the current or another workflow.
-
Edit the action: edit the current action’s properties
-
Create hop: this option closes the dialog and adds an open hop. Click on any other action icon in your workflow to create a hop to that action.
-
Detach action: remove all hops to and from this action. If this action connects 2 other actions through hops, a hop between these actions will be created.
-
Edit action description: opens the description dialog for this action
-
Delete this action: delete this action from the workflow. No new hops will be created if this action was connected to other actions.
-
-
Advanced
-
Parallel execution: enable or disable parallel execution for actions after the current action.
-
-
Logging
-
Edit Custom Logging: set a custom logging level for the current action
-
Clear Custom Logging: reset the logging level for this action back to
Basic
-
Two shortcuts to open the workflow or pipeline specified in an action are to hover over the icon and hit the z key, or CTRL-SHIFT-click on the action icon. |
Click on an action icon to open the popup dialog. Click on the action name to directly open the action’s properties. This is a shortcut to clicking on the icon and selecting Edit from the popup dialog. |

Pipeline Options
The 'Basic' category contains a number of operations you can perform on the current pipeline.
-
edit pipeline: edit this pipeline’s properties: description, parameters etc.
-
create: add a note to this pipeline
-
paste from the clipboard: paste transforms, notes or an entire pipeline from the clipboard
-
copy as pipeline action: copy this pipeline to the clipboard as a workflow action, so you can paste it in a workflow as a pre-configured pipeline action

Pipeline Transform Options
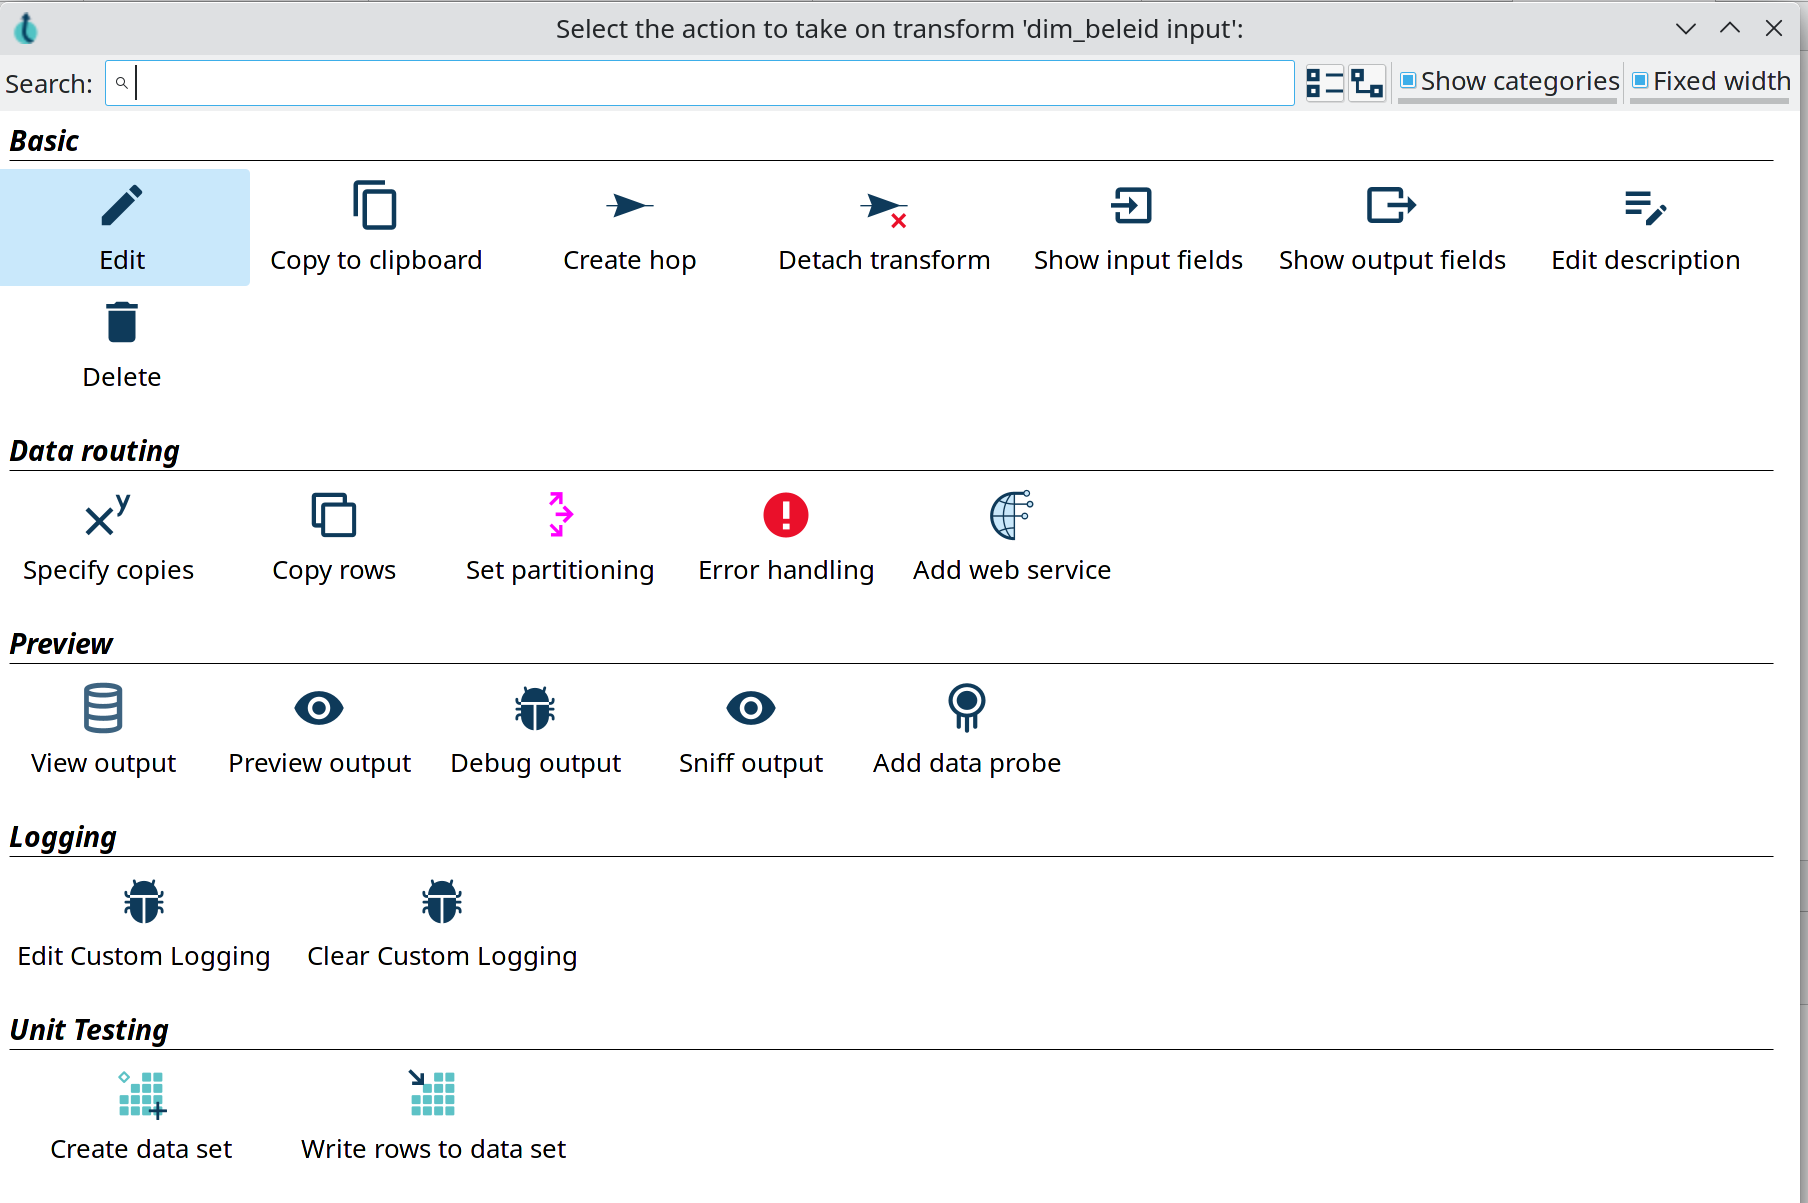
When clicking on a transform icon, the popup contains a number of actions to work with transforms:
-
Basic
-
Edit: edit the current transform’s properties
-
Copy to clipboard: copy this transform to the clipboard, so you can paste it in the current or another pipeline.
-
Create hop: this option closes the dialog and adds an open hop. Click on any other transform icon in your pipeline to create a hop to that transform.
-
Detach transform: remove all hops to and from this transform. If this transform connects 2 other transforms through hops, a hop between these transforms will be created.
-
Show input fields: show all the fields entering this transform
-
Show output fields: show all output fields resulting from this transform
-
Edit description: opens the description dialog for this transform
-
Delete: delete this transform from the pipeline. No new hops will be created if this transform was connected to other transforms.
-
-
Data Routing
-
Specify copies: set the number of transform copies to use during execution
-
Copy/distribute rows: make the transform copy/distribute rows during execution. The option is contextual: if the transform is copying rows, only the distribute option will be shown and vice versa.
-
Set partitioning: specify how rows of data need to be grouped in partitions allowing parallel execution where similar rows need to end up on the same transform copy.
-
Error handling: configure error handling for this transform (for supported transforms)
-
Add web service: use the output of this transform as a web service with Hop Server.
-
-
Preview
-
View output: view output of this transform in a running or finished pipeline.
-
Preview output: execute the pipeline and see the output of this transform
-
Debug output: execute the pipeline and debug the output of this transform. Execution will pause when the debugging conditions are met.
-
Sniff output: take a look at 50 rows of output from the selected transform in a running pipeline
-
Add data probe: streams the output rows of this transform to a pipeline defined in a pipeline probe.
-
-
Logging
-
Edit Custom Logging: set a custom logging level for the current transform
-
Clear Custom Logging: reset the logging level for this transform back to
Basic
-
-
Unit Testing
-
Unit testing: create an empty data set with the output fields and layout for this transform
-
Write rows to data set: run the current pipeline and write the output of the current transform to a data set.
-

| The options shown for Unit Testing are just a subset of the available options. Check the unit testing docs for a detailed explanation of all the unit testing options. |
Click on a transform icon to open the popup dialog. Click on the transform name to directly open the transform properties. This is a shortcut to clicking on the icon and selecting Edit from the popup dialog. |
Hop Options
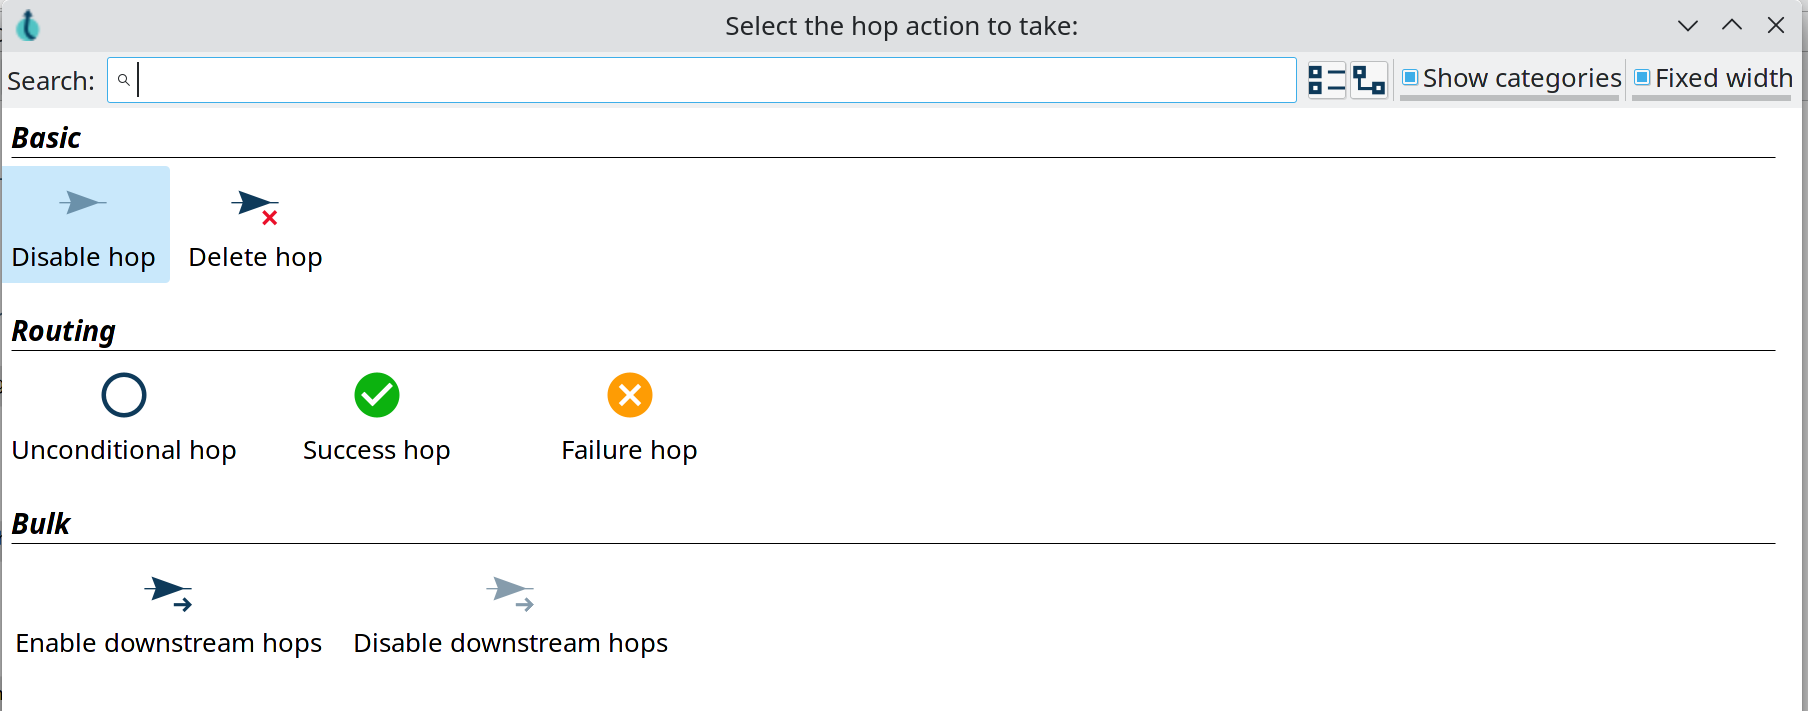
The Hop options, available from both the workflow and pipeline editors, offer a number of operations you can perform on one or more hops.
For pipelines, the dialog offers the following options:
-
Basic
-
disable/enable hop: enable the current hop (if disabled) or disable the current hop (if enabled). This option will only show the applicable options (e.g. 'enable hop' won’t be shown for active hops and vice versa)
-
delete hop: delete the current hop
-
-
Bulk
-
Enable downstream hops: enable the current hop, and all hops that follow later in the workflow (or pipeline).
-
Disable downstream hops: disable the current hop and all hops that follow later in the current workflow (or pipeline).
-

When working in a workflow, the hops popup dialog has all the options as the pipeline hop dialog, with one additional category:
-
Routing
-
Unconditional hop: make the current hop unconditional (ignore the result of the previous action and follow this hop anyway)
-
Success hop: make the current hop a success hop (only follow if the result of the previous action is 'success')
-
Failure hop: make the current hop a failure hop (only follow if the result of the previous action is 'failure')
-
